One may want to create a system image in Windows 11 to overcome problems like system crashes, virus infection, blue screen errors. Many times due to such errors, you may not be able to boot to your computer, and it may also cause data loss. In such a case, the possible fix for the problem will be to reinstall the system. However, when reinstalling the system, you will have to reinstall all the software and this will not save all the data that was already present on your system. To overcome this problem, one creates a system image.
A system image can be used to recover the Windows and will also save your data, without you having to reinstall the software again. Windows 11 has built-in tools to help you create a system image in Windows 11. Here we will be discussing how you can create a system image in Windows 11.
Creating System Image On Windows 11
You can use backup and restore options in the Control Panel, to create a system image in Windows 11. This is a built-in option in the Windows system to help you create a system image without any issue. Follow the steps given below to create a system image in Windows 11-
- Open the start menu by pressing the Windows key or by clicking on the Start icon.
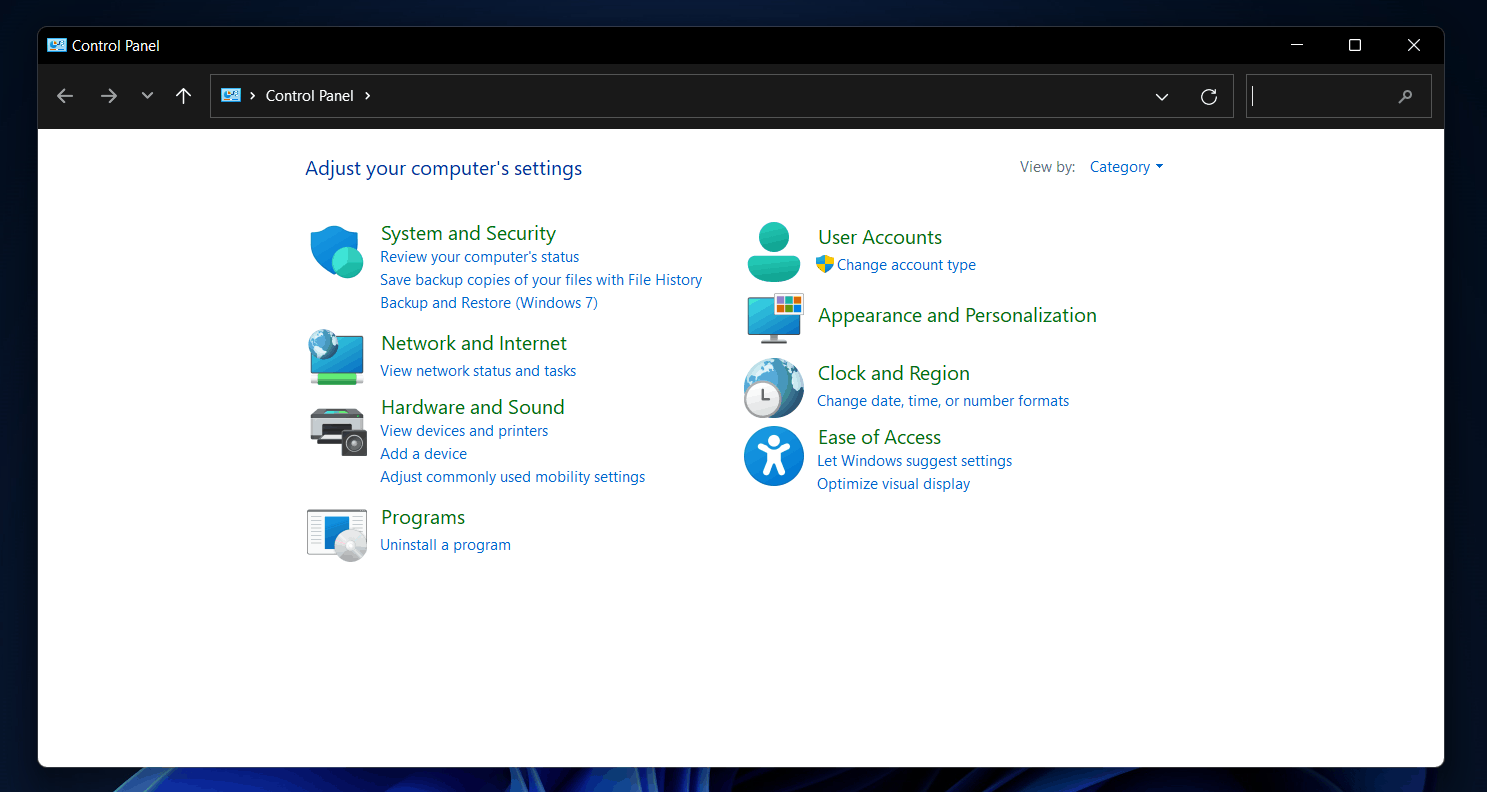
- In the start menu, search for the control panel and open it.

- Under the System and Security section in the control panel, click on Backup and Restore (Windows 7).
- Here on the left sidebar, click on the create a system image option. This will open up the create a system image window.

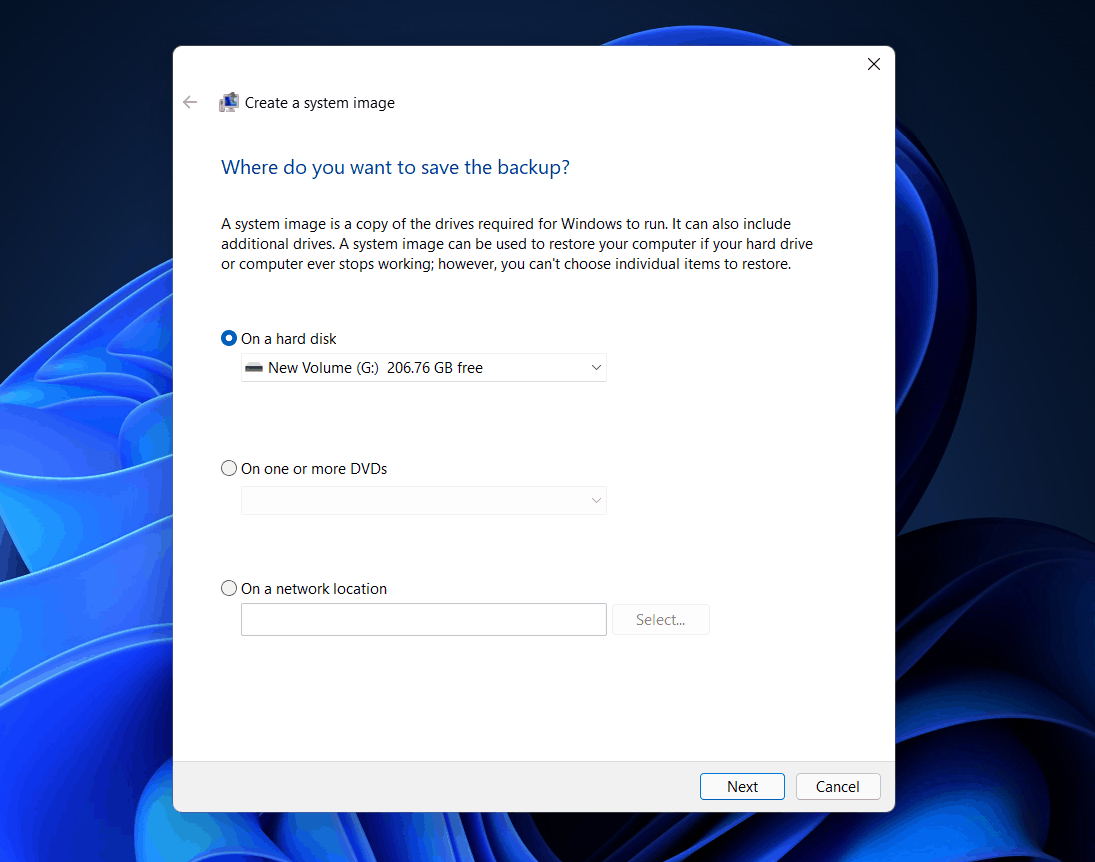
- You will have to select the location of where you want to save the backup or the system image that you want to save. You will have the option to select either the hard disk, DVDs, or a network location. Select the locations where you want to save the image. Once done, click on next.

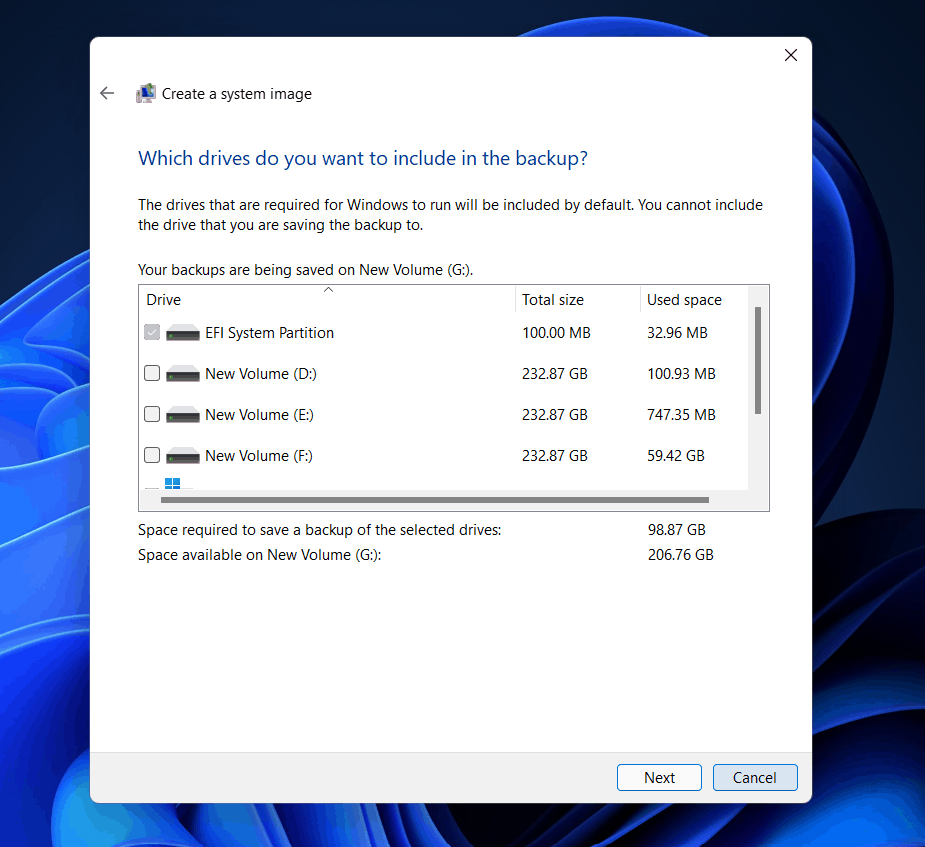
- If you select on a hard disk option or on one or more DVDs option, then you will see all the disks here. Unselect the disks and drives on which you don't want to take the backup. Ensure you select the disk that can handle the size of the backup. Click on the next option.

- Click on the start backup option to start the backup process.
- You will see Windows is saving the backup message on the screen. If you don't want to take the backup, then click on stop backup to stop the backup.
- Wait for the process to get completed. Once the process is completed, click on close to close the window. You will get the option to create a system repair disk. Click on yes to create a system repair disk.
FAQ
What Is A System Image?
System Image means taking a complete backup of everything including the files and software on your PC. This will create an image of the system as it is, so you can anytime revert to the previous state.
What Is The Different Between System and Backup?
System backup is done on a small scale, to restore a few files in case of data loss. However, a system image means copying your entire drive and restoring your system to the previous stage if any data loss occurs.
How Do I Create A System Image On My Computer?
You can easily create a system image using the backup and restore option on the Control Panel. We have discussed how you can create a system image of your PC.
How Often Should I Create A System Image?
You must prefer creating a system image after you make some changes to your system. It would be preferred if you keep the backup frequency of one week.
Can I Boot From A System Image?
You can boot from a system image and restore your PC using it if you have a Windows installation disc with you.
RELATED GUIDES:
That's how you can create a system image in Windows 11. We have discussed the primary method to create a system image in Windows 11.
Source link


No comments:
Post a Comment
Note: Only a member of this blog may post a comment.