I started blogging on Hashnode last year in October and my analytics tell me that I have ~40k views on my blog posts so far, with an average of 4 posts/month. I plan to reach 100k views before the end of this year, and the plan is pretty simple: WRITE BLOG POSTS MORE OFTEN. In the end, I should also get better at this if I'm writing more often, because I really know I need it 😁.
Now what does this have to do with Google Analytics? Well, I want to make this goal more public, so I will automatically update my Twitter cover photo with the goal status. It will look something like this when it's done:
For this I think I'll use an Azure Function which will:
- grab my blog views every hour for the past year
- write them on an image
- set that image as my Twitter cover photo
In this blog post I'll show you how I'm retrieving my page views from Google Analytics.
- Create an application in Google Console
- Create a service account
- Add Google Analytics to your app
- Add that user to the admin
- Write the code
1. Create an application in Google Console
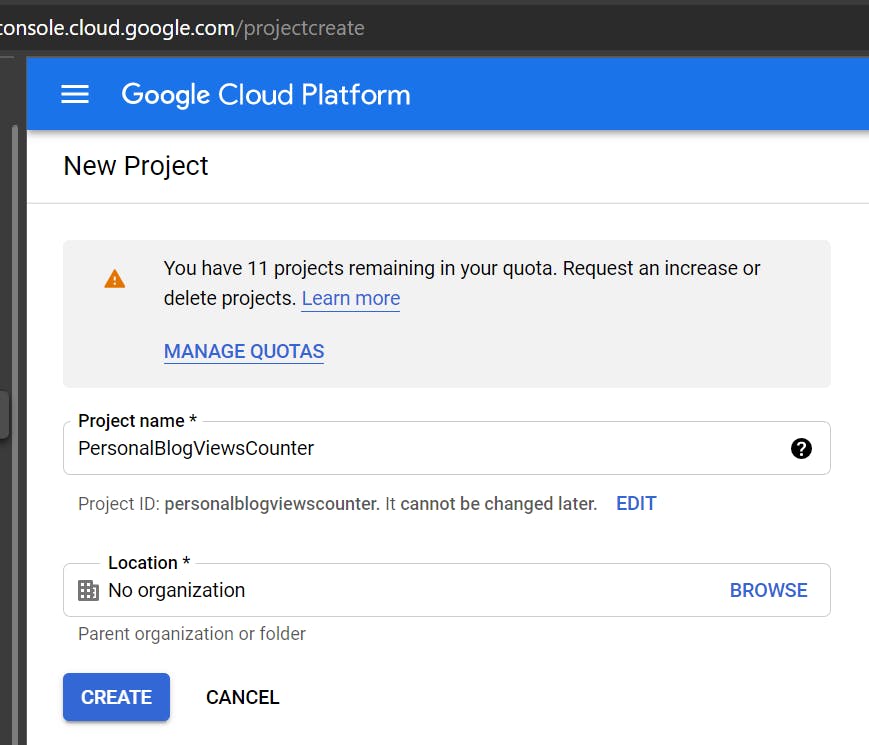
Go to console.cloud.google.com/projectcreate to directly create a project. Add a name and click on Create.
2. Create a service account
Wait a few seconds for the project to be created, and then navigate to the project's page.
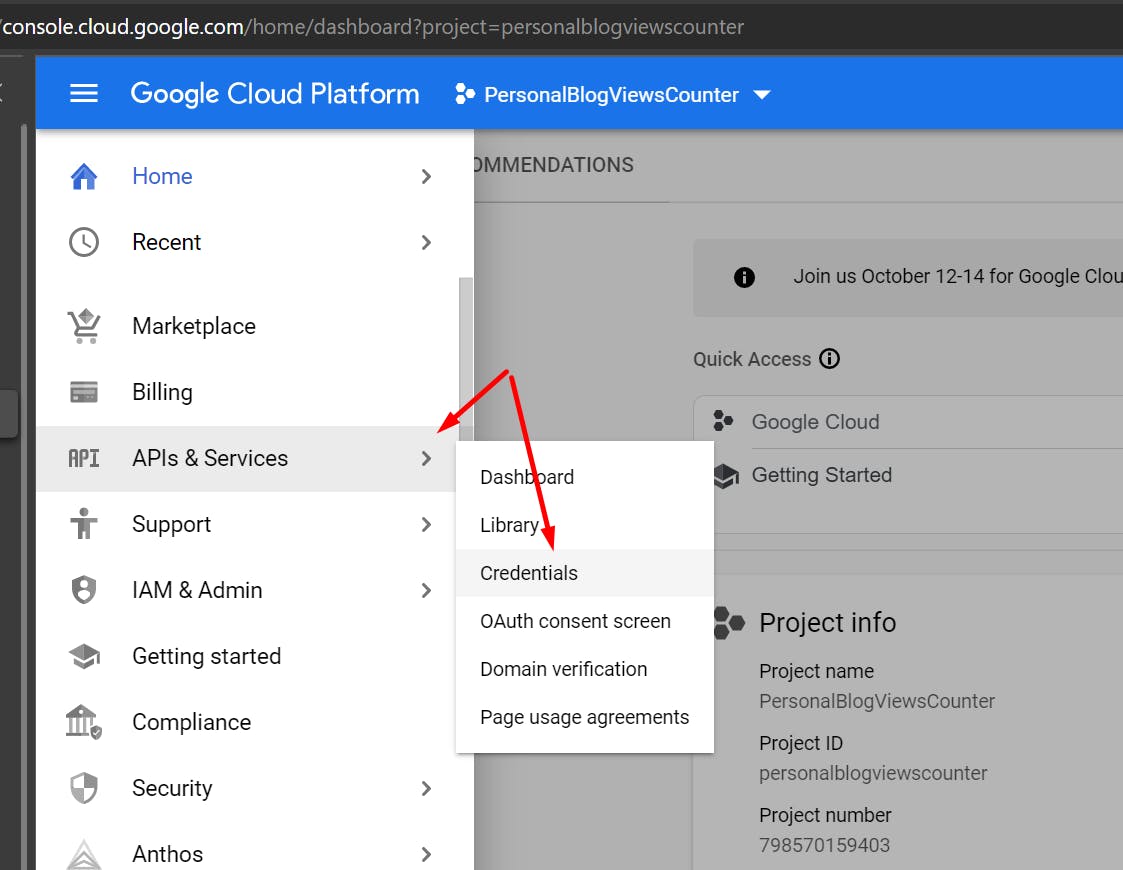
Here, you can create a service account if you go to APIs & Services -> Credentials
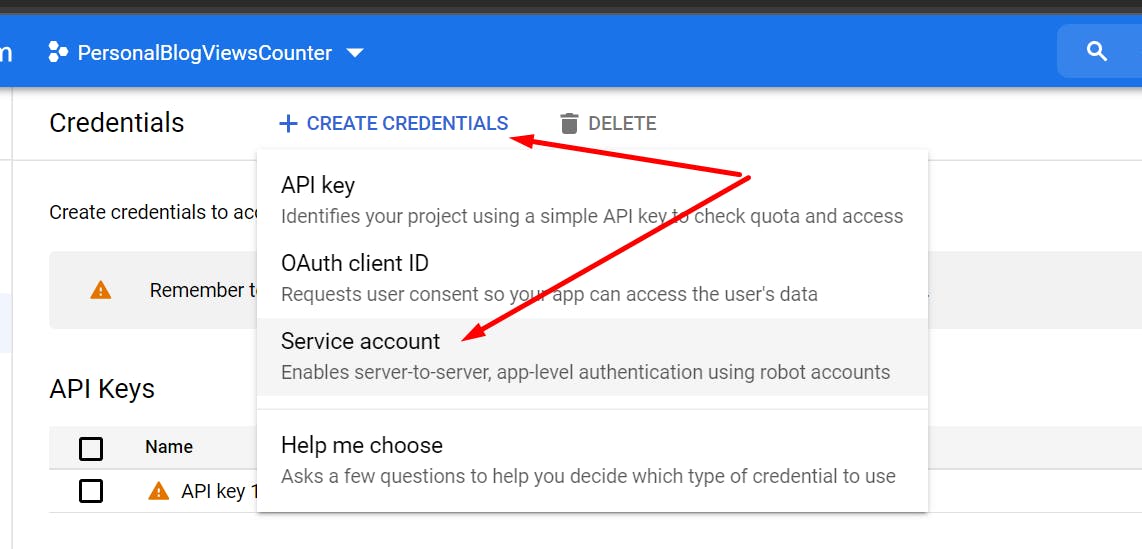
Now click on " + Create credentials" -> "Service Account"
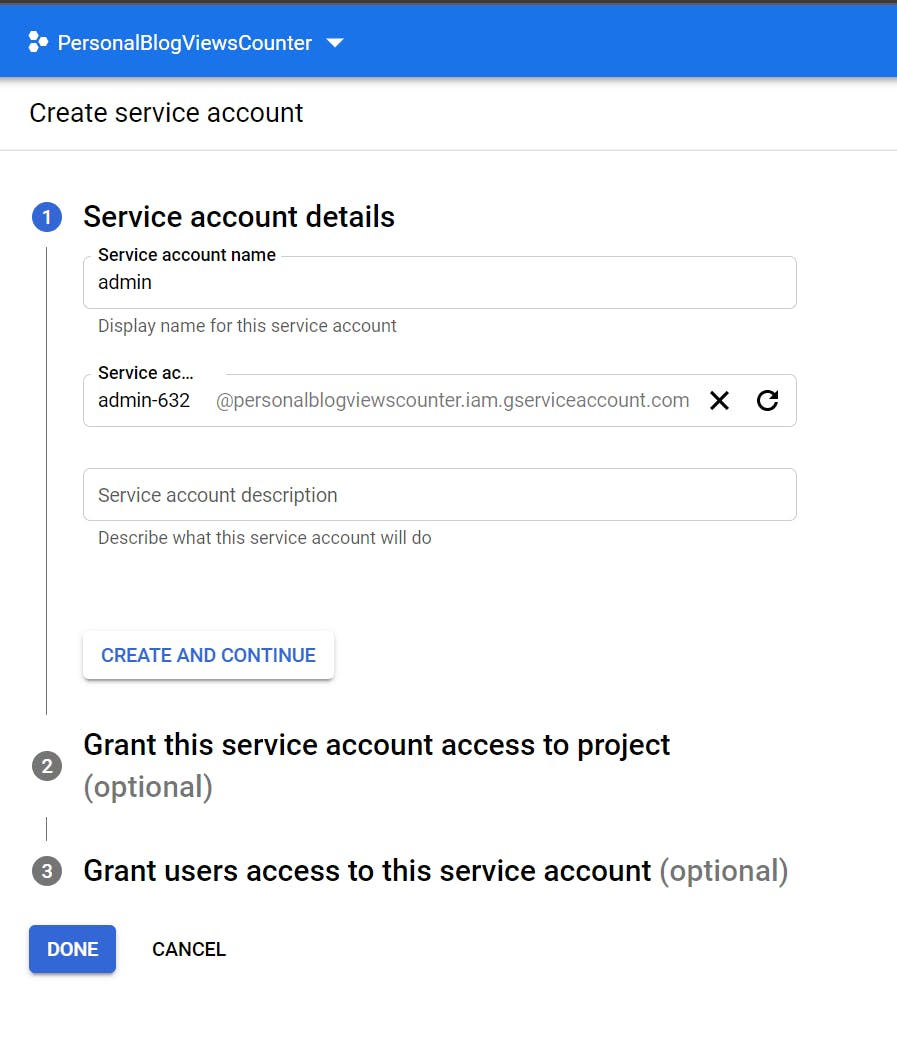
Add a name and click on "Create and Continue"
Now click on the Role and choose Basic -> Viewer. You can pick Owner or other ones, but for what I need, Viewer is enough.
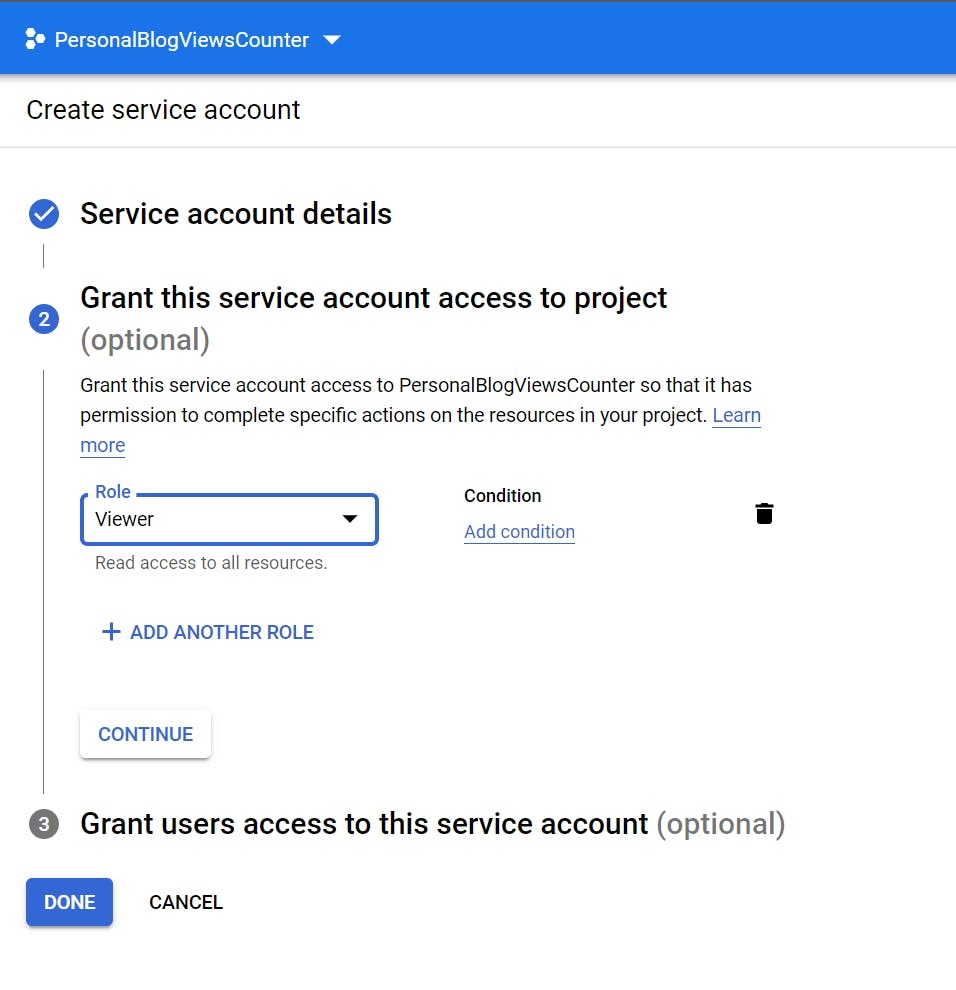
Now click on Done and the service account will be created.
In order to authenticate with this service account, we'll need a certificate, which can be created like this:
Click on Manage service accounts:

Click on the user you created, and then go to keys.
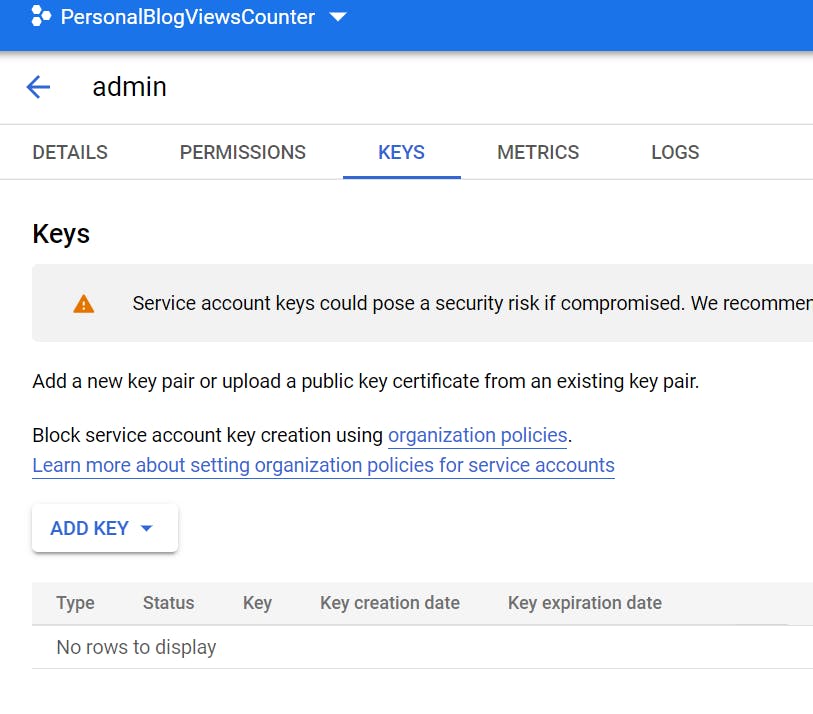
Now click on "ADD KEY", pick P12 key, and click Create.
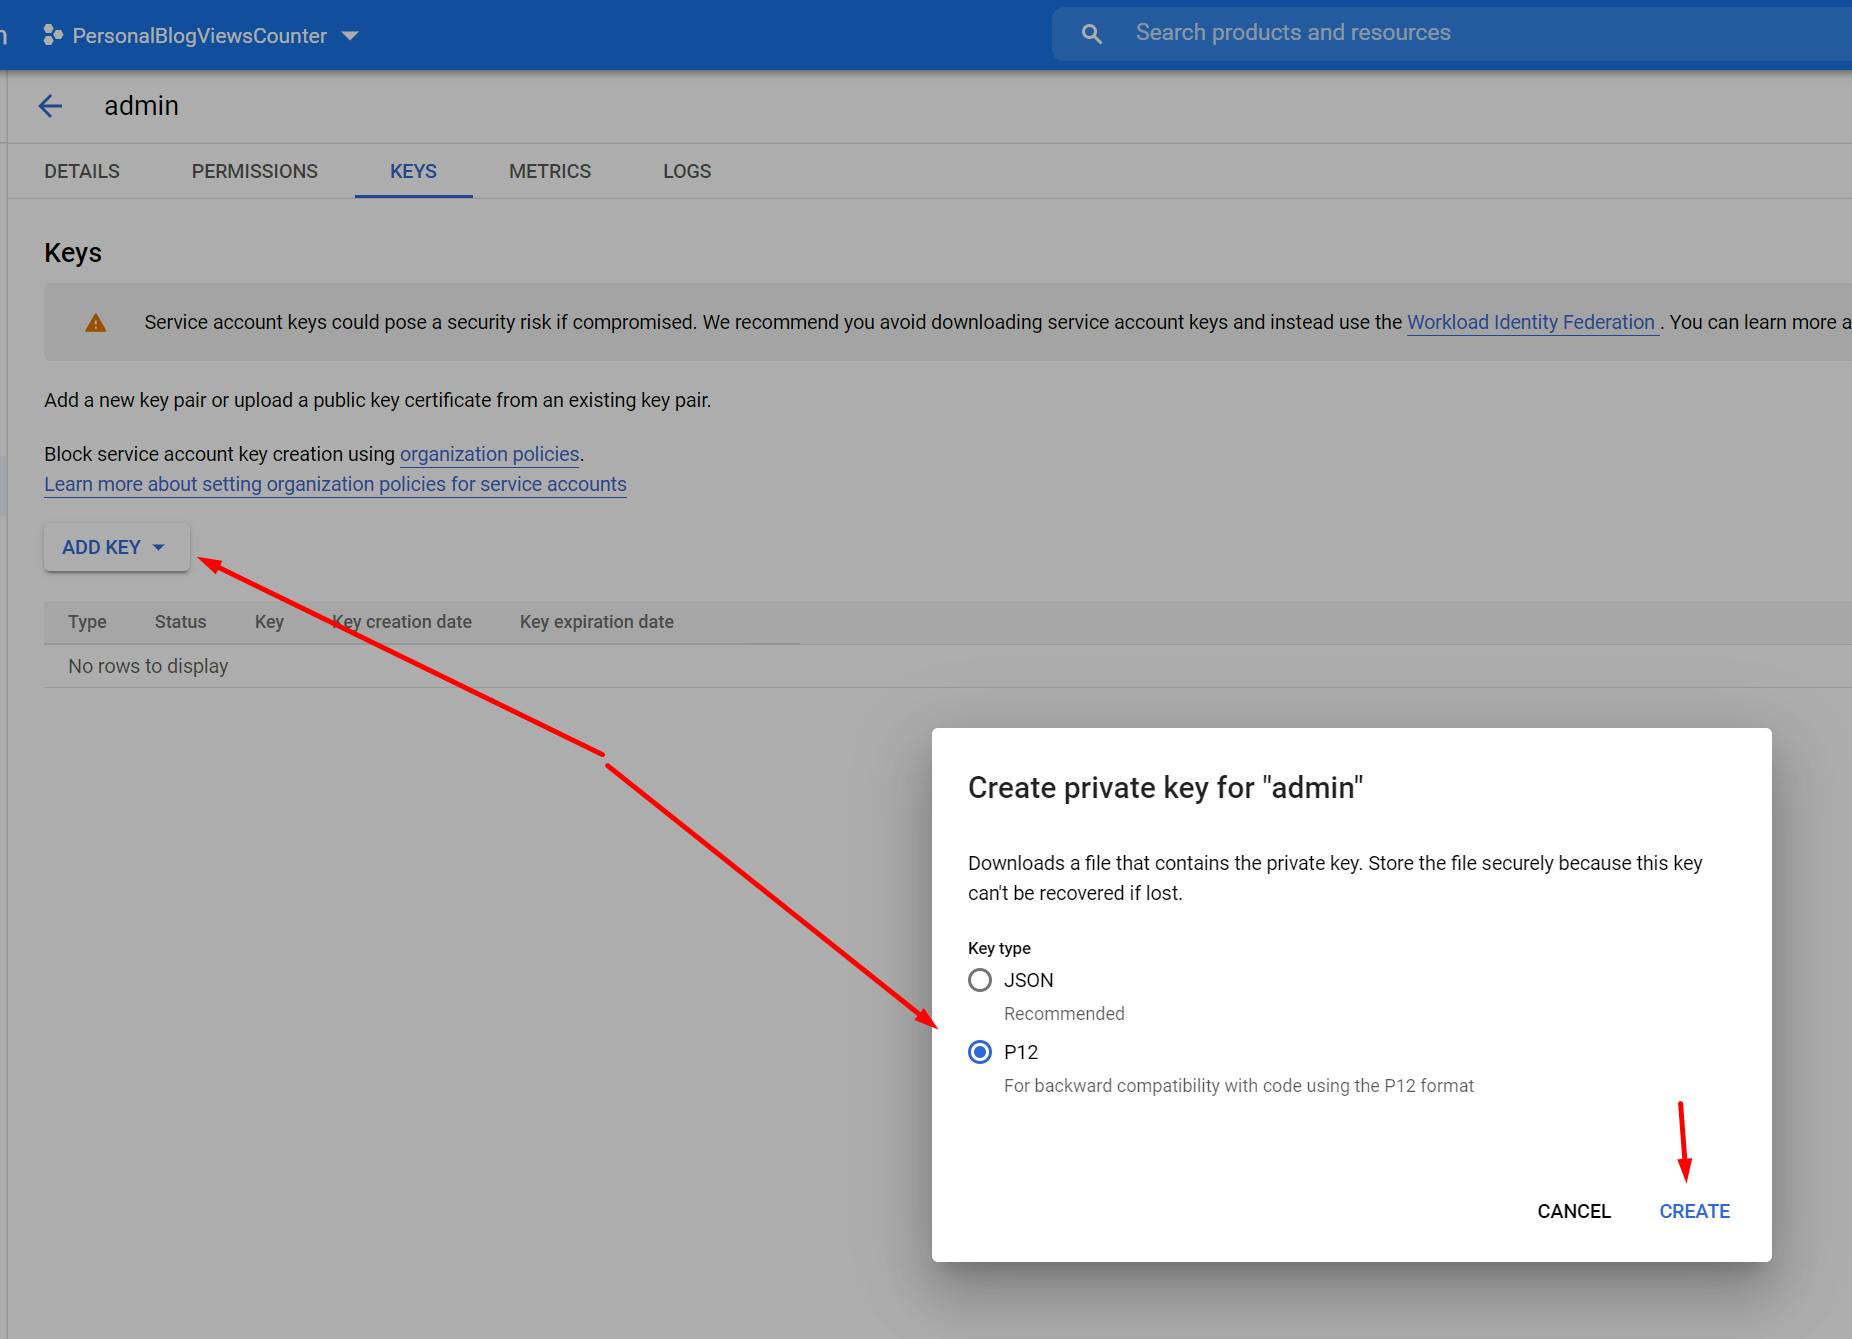
The key should download automatically and you will see a password. Write that password down and move the certificate somewhere else if you need to, because we'll need the path as well.
3. Add Google Analytics to your app
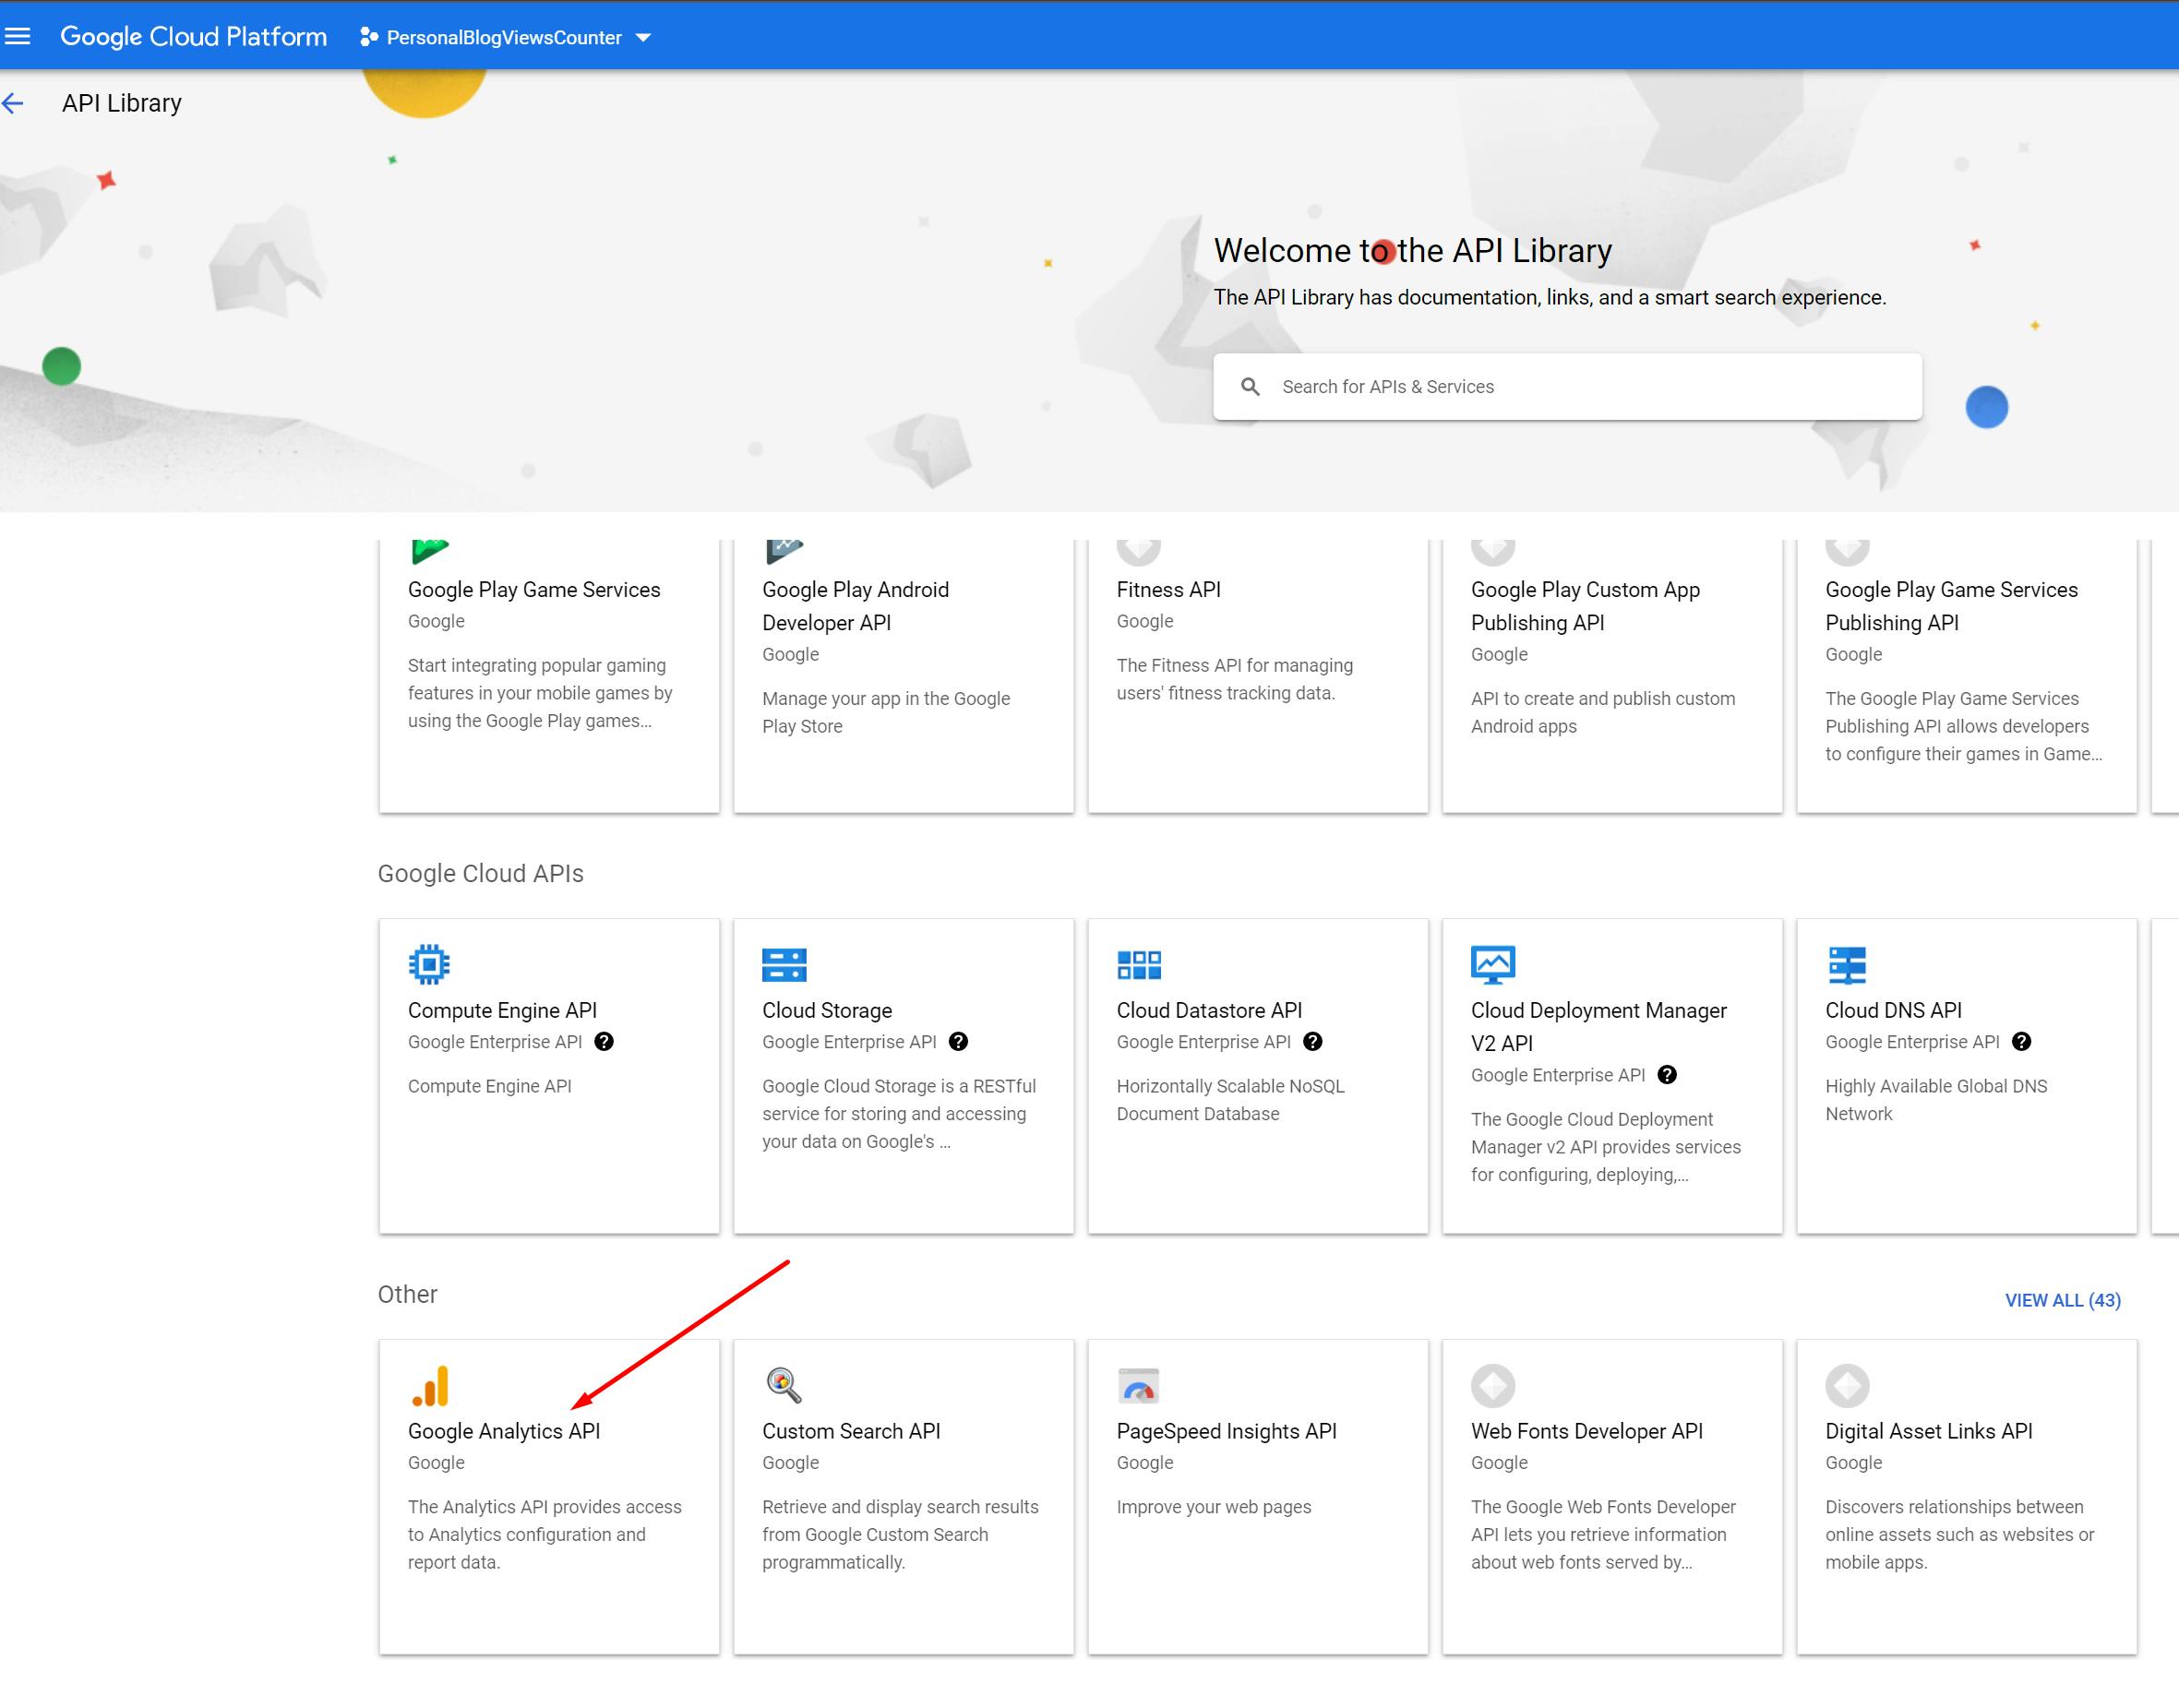
Go to APIs & Services -> Library
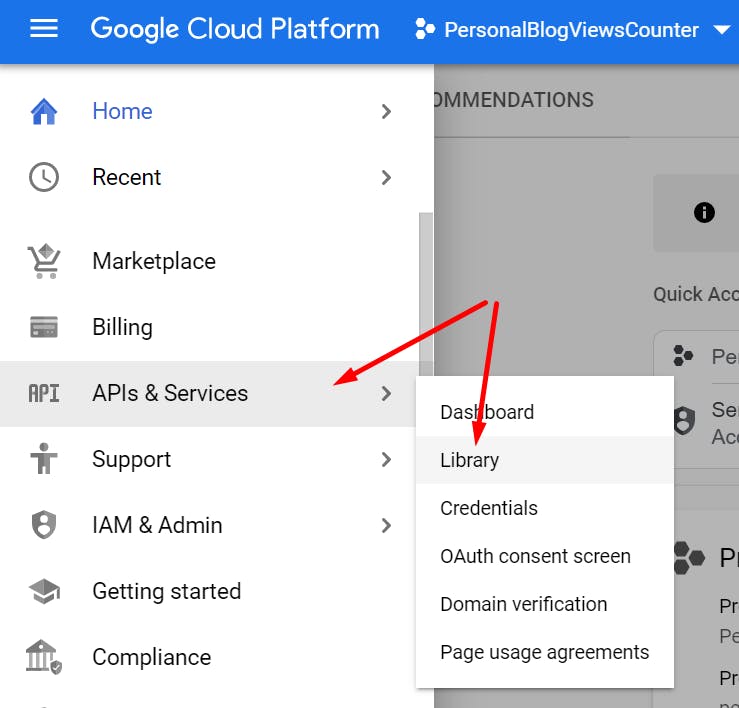
On the "Other" category you'll find Google Analytics API, click on it:
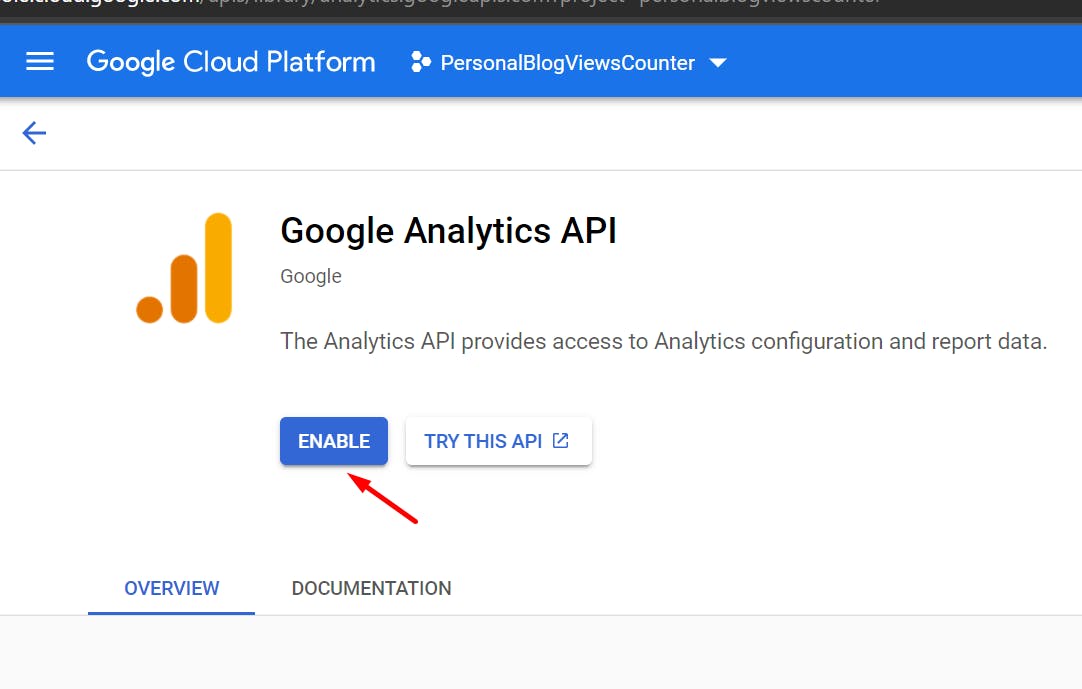
Click on Enable:
4. Add the user to the property
Go to Google Analytics, select your property, and click on View Access Management.

Click on the + sign, and then on "Add users"

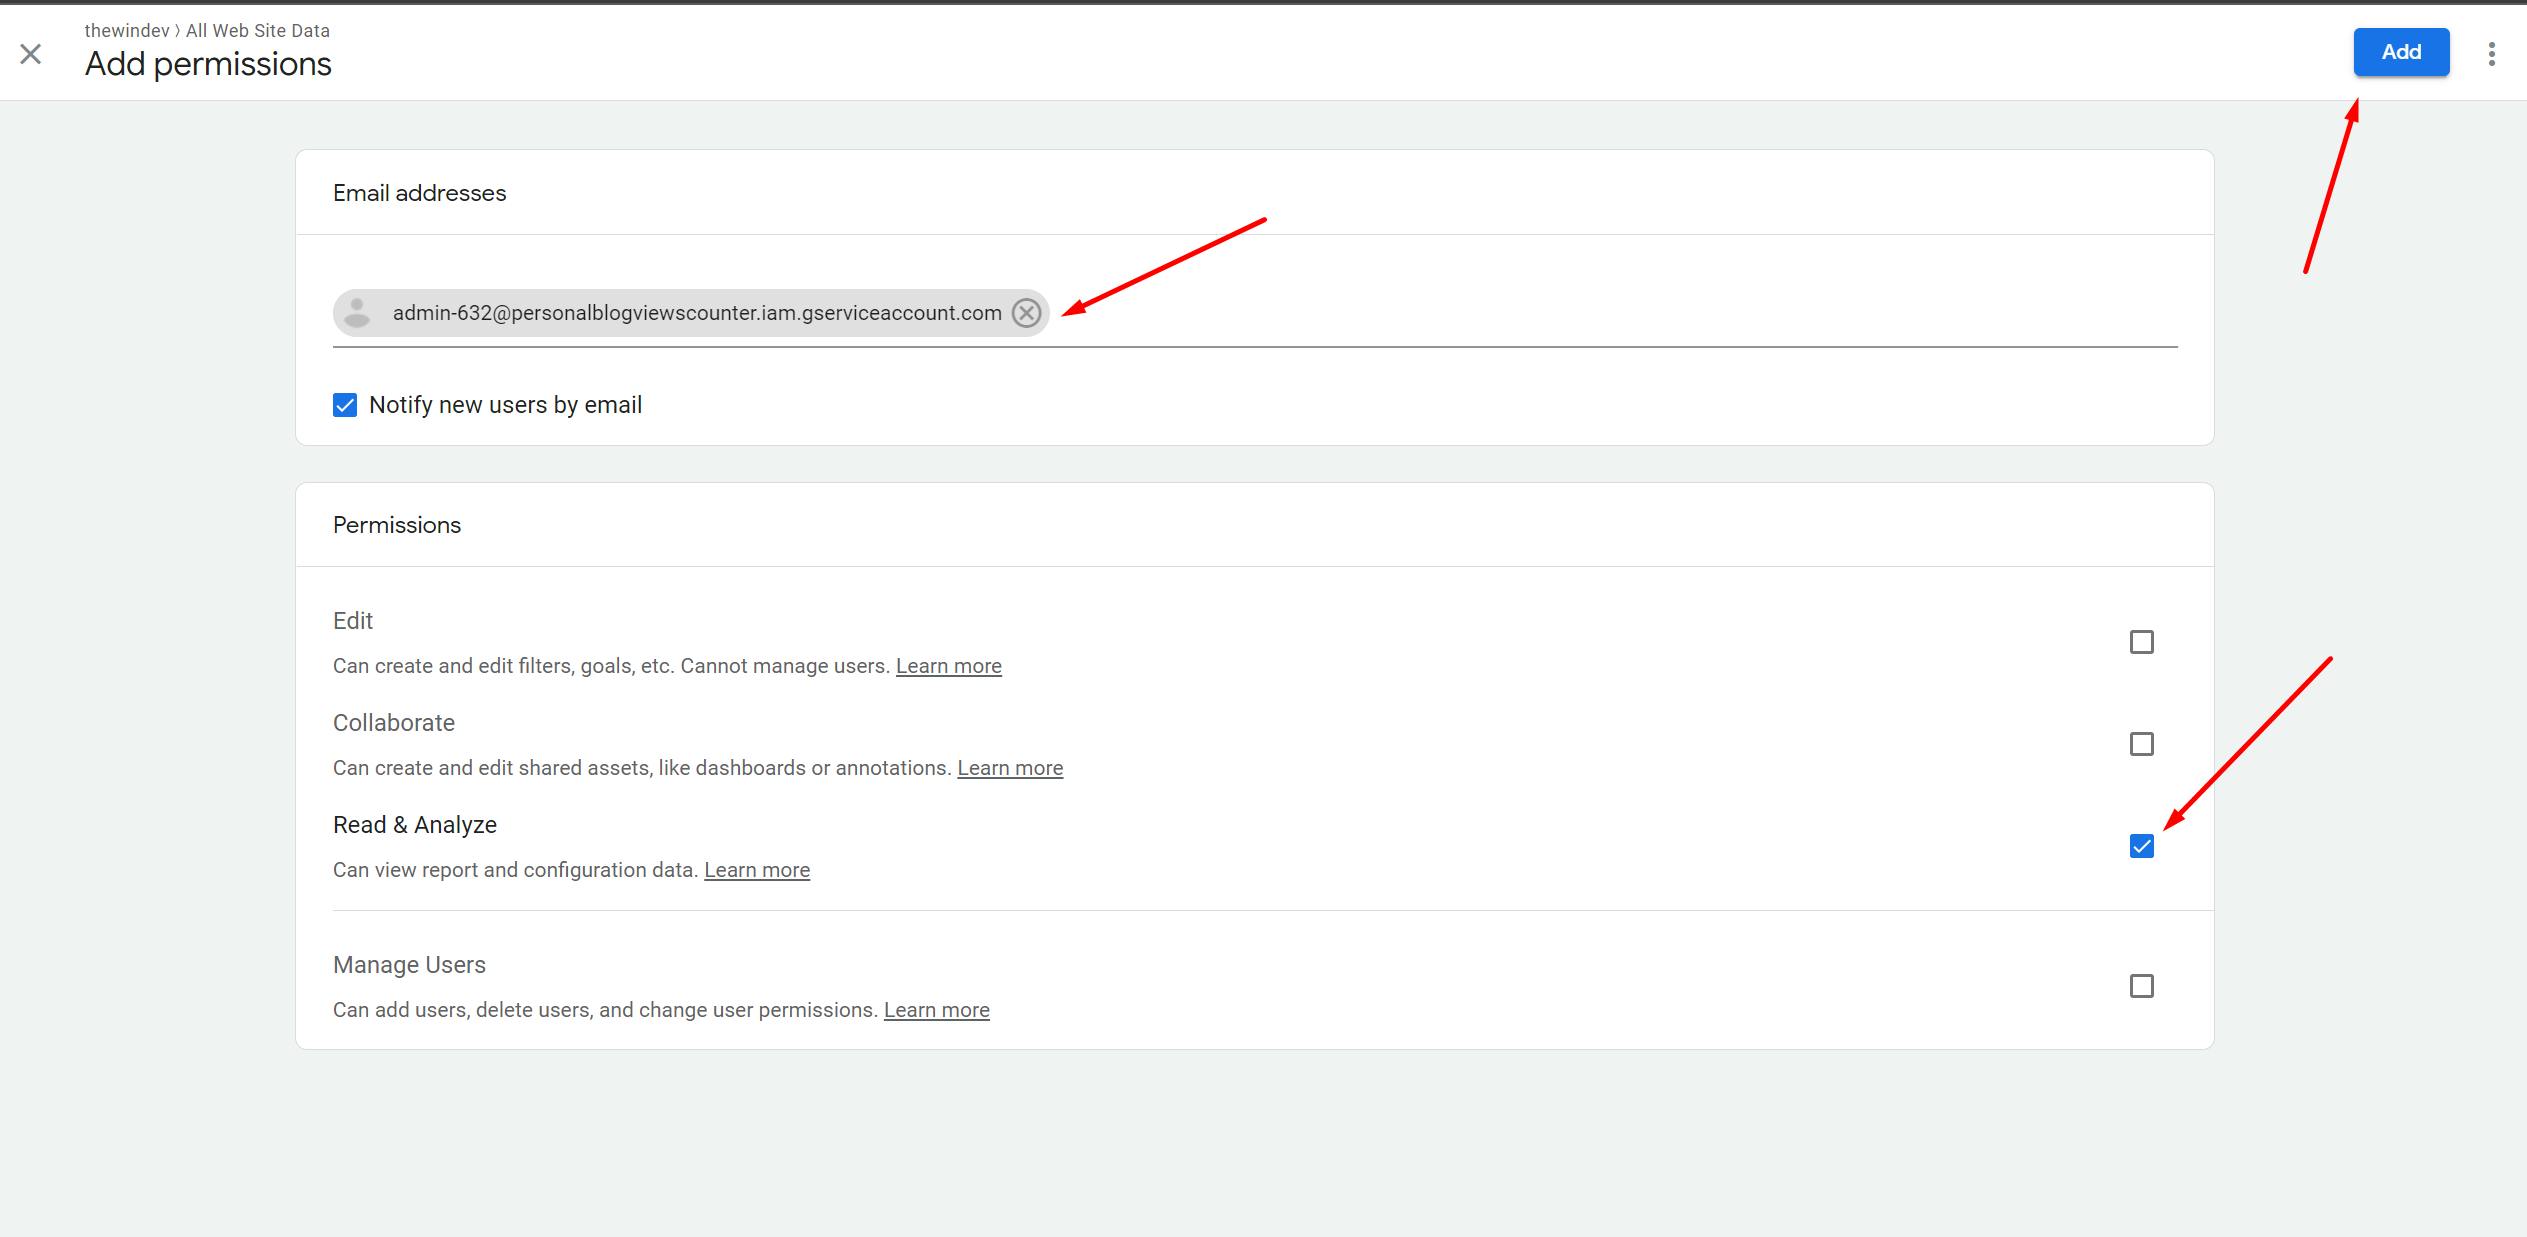
Add the email address of the service account, choose "Read & Analyze", and click on "Add" on the top right corner.
5. Write the code
Right now I'm using a simple .NET Core 3.1 Console Application to test the code. We'll have to install these two libraries first:
<ItemGroup> <PackageReference Include="Google.Apis.Analytics.v3" Version="1.55.0.1679" /> <PackageReference Include="Google.Apis.Discovery.v1" Version="1.55.0" /> </ItemGroup>
The entire code is available in the gist below. We start with authentication, which is done in the PrepareCredentials() function. You need to put the certificate we downloaded earlier somewhere on your drive, and send its path as a parameter. You'll also need the certificate password and the service account email address.
This piece of code will give me all the views from the past year, and I can use it for the next part, where I will write this number on an image and set it as Twitter cover photo.
Follow me on Twitter if you want to be notified when I share the next part 


No comments:
Post a Comment
Note: Only a member of this blog may post a comment.